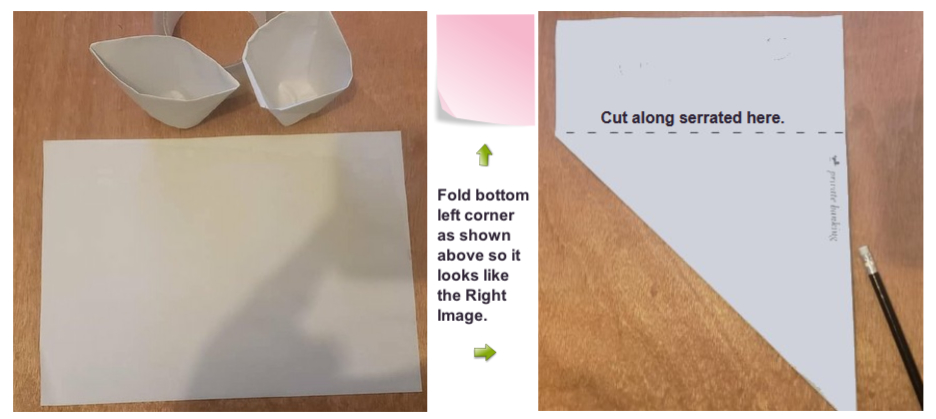
How to make an Origami Paper Cup. Hopefully my directions are good enough for you to follow. Here is fun for all the family as the parents can join in on this fun cup making adventure.
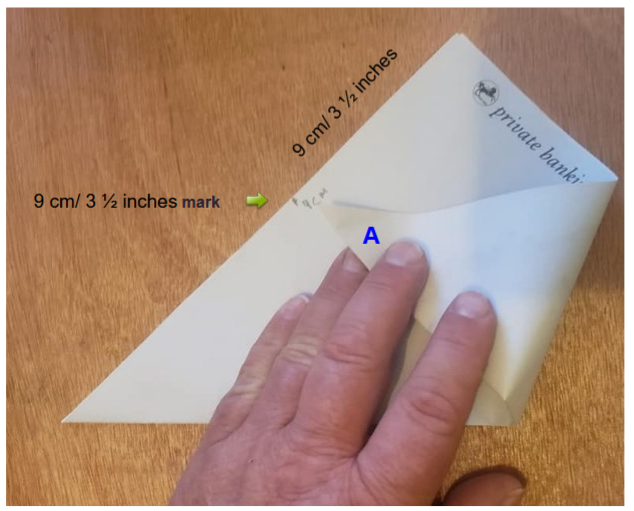
Now put the folded edge to the bottom, giving it a triangle look. Next fold the edge “A” as seen in the image below to the measured mark of 9 cm/ 3 ½ inches from the top.
Press the edges down
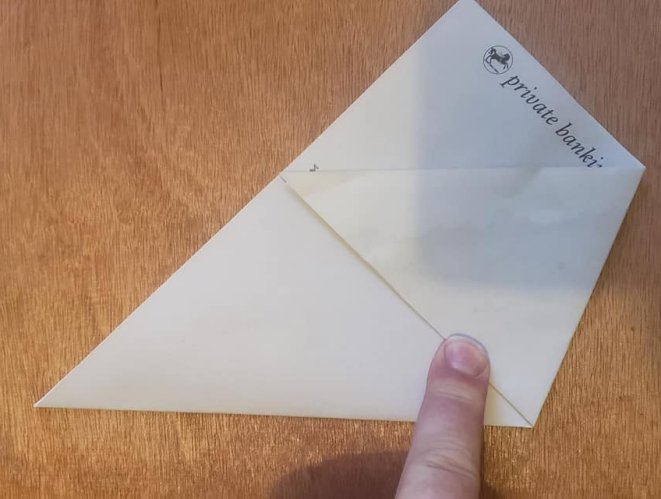
It should look like this
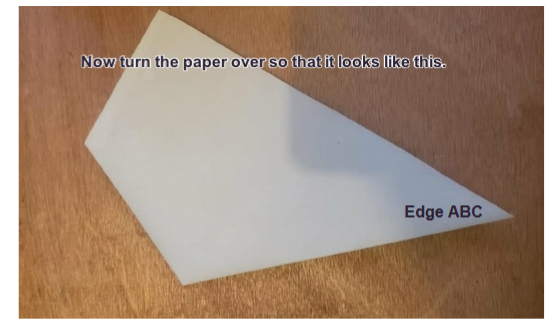
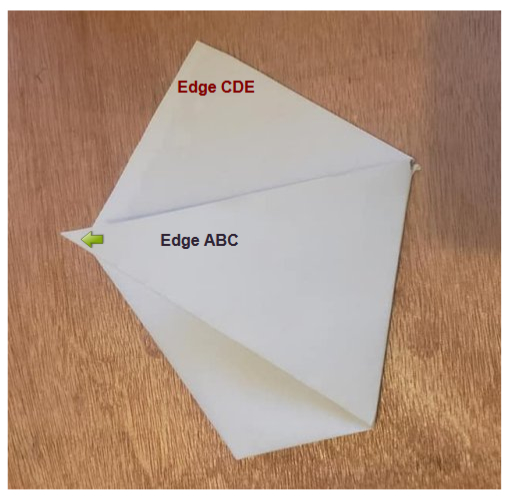
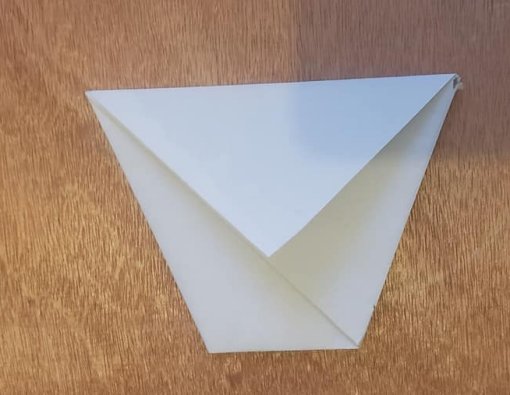
I love making these paper cups so I do hope that I am explaining this so that you can make them as well. Now you can fold Edge ABC as seen in the image above to the position as seen in the image to the left. Next take the top Edge CDE, and fold it down making the top of the cup. You can now see a hole where the water can go in.
The image above should be what your cup now looks like. If you make it round like the first image on this page you can now put water in it. This would be very useful when you are away from cups, have water, need a cup and you have paper with you.
You can just make a cup when you need to do so. Its only paper so it won’t last forever, but if you used a stronger heavier graded paper or thin cardboard it would probably be better Enjoy.