Affinity Software has a certain Learning Curve that one must get through before the software can be used at ease. Crop to some may not be obvious so I share how to use Crop here.
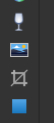
Image 1 - Vector Crop Tool
Image 1 shows the Vector Crop Tool. Crop is the square shape with the line through it. Select that once you have chosen the picture you want to crop and the picture is in the Affinity Designer Editor.
Image 2
Image 3
Image 2 and Image 3 show the corners of an image. Image 2 shows the corner when the Move Tool is selected. Image 3 shows the Image corner when the Crop Tool is selected.
Move the Mouse Cursor over the corner and an arrow with two points appears. This is to show you that you can Select the image corner and drag it to where you want it to go to crop the image.
Image 4
Lets crop the Image 4 image so we can only get the words “For Children!” Using the Mouse and Cursor over the Image Corner, press down the Mouse Button and drag the corner inwards towards the Title to select that area.
Image 5 - Right Top Corner dragged over.2
Image 6 - The Cropped Title.
Once you have cropped the Image as is seen in Image 6, use Cut or Copy to capture the image and then File, and Paste From Clipboard. Once that is done if you are happy with the Image and want to save it go to File then Export and save your image.