Wairakei Place, Tokoroa.
Copyright © All rights reserved. Made by James Martin Sandbrook.
Abrev. Advice. Camera. Character. Children. Computing. Crosswords. Driving. Electronics. Fitness/Self Defence. Garden.
Health. Homeschooling. Housework. Idioms. Jokes. Kitchen/Cooking. Measure. Mechanics/Machines. Motivation. Movies. Music.
NZ. OOS/RSI. People. Personal Care. Poetry. Projects. Proverbs. Religion. Reviews. School Education. Skills/Hobbies. Slang.

Removing/Installing a DVD Drive in a PC.
I wanted to watch a DVD and my PC DVD Player refused to co-operate so I thought that this was a good time to take out my old DVD Drive and install another one and explain how to do this.
Removing the old DVD Player and installing another DVD Player is simple, it is not very hard at all, but some care needs to be taken.
I have many DVD Drives and more Hard Drives, collected over the years and taken from computers I have upgraded or thrown away. Tip: Never leave your hard drive in a computer that you are throwing or giving away because all the data (unless it was overridden) can be recalled. If you delete files on a hard drive the files are still there and can be retrieved if you know what you are doing.
It always amazes about how careless people are when they sell their computers second-hand and leave all their data on their hard drives, or they delete the data and assume that it cannot be retrieved when it can be done easily.
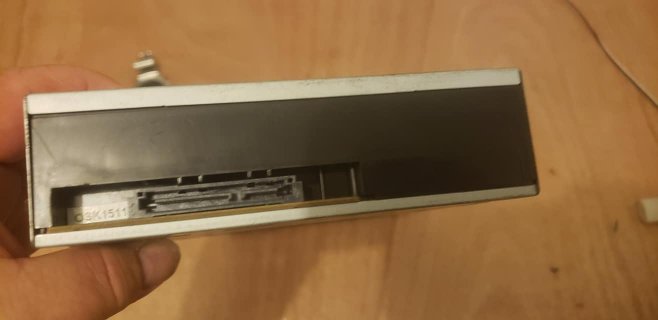
Above is a photo of a SATA Drive with its two sockets for the Power Connector and Data Connector.
You can, at this stage should you want to, take photos of each step on your cell phone so that you can refer to them when installing the new drive.
The first thing we need to do is to shut down the computer.
Turn off the computer and unplug it.
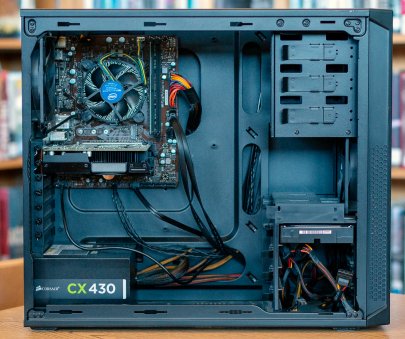
Then remove the side panels.
Some computers need the front panel removed, mine didn’t, I just removed both side panels.
On the sides of the DVD Drive are screws that need to be carefully removed (Make
sure that you are careful and don’t drop them inside the computer because they may
be hard to get out being so small and all). These screws are the mounting screws
for the DVD player and they must be removed so that the DVD Player can come out.
My DVD Drive came out the front easily.
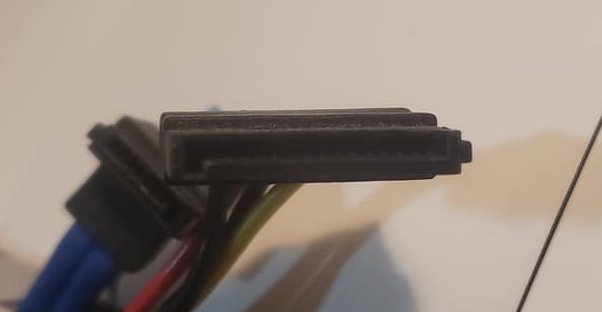
Above are the Power and Data connectors for my SATA drive, your drive could be a IDE and look different, it doesn’t matter just be sure that your new DVD Drive can use the power and Data Cables your old one used for easy instalment.
Once the DVD Player is out the new DVD Player can be slid into the slot that the old DVD Player lived in.
Note that there may be some dust so do take the time to vacuum or wipe away the dust being careful not to knock anything.
Basically the installation of the drive is the reverse of removing the drive.
Where you removed the old DVD Drive you now install the new drive, putting back the screws from the old drive to mount the new DVD Drive in the same place.
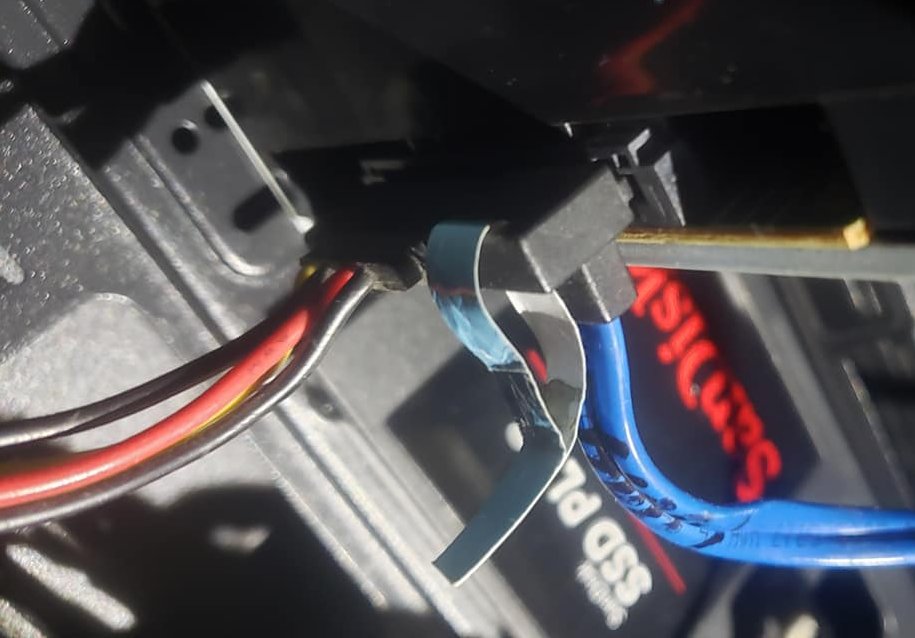
Below you can see the same plugs shown above plugged into the drive after installation.

Abrev. Advice. Camera. Character. Children. Computing. Crosswords. Driving. Electronics. Fitness/Self Defence. Garden.
Health. Homeschooling. Housework. Idioms. Jokes. Kitchen/Cooking. Measure. Mechanics/Machines. Motivation. Movies. Music.
NZ. People. Personal Care. Poetry. Proverbs. Religion. Reviews. School Education. Skills/Hobbies. Slang. Stories.
Double check your work, and if you took notes, video taped what you did it took photos, now go over them and check your work.
Now that the DVD Player is in its Drive Bay, plugs in place, sides put back on and screwed into place, that should be all there is to it.
It is not that hard to do. I had my old one out and the new one in , in a few minutes.
All the best from
James M Sandbrook.
23rd of March, 2021.